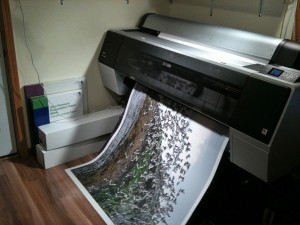
About six months ago it became clear to me that I needed to be able to print bigger pictures. Over the past decade I have graduated from a 13-inch printer, to a 17-inch, and then a 24-inch. But the next size up, a 44-inch wide Epson 9900, soon became a priority.
Why? I sensed intuitively that bigger images have a bigger emotional impact on the viewer; that size is part of what turns a photograph into art; and that there are subtle details in images that are only revealed when they are printed sufficiently large. Of course, only the very best images can stand up to extreme enlargement, and even those must be processed just right to look great. Almost every step in my workflow would need to be upgraded. As it turned out, getting a bigger printer was the easy part. The rest has involved a lot of work and a lot of trial and error.
Georgia and I specialize in making stretched canvas, although we print a lot of images on paper for our customers. Until now, prefabricated stretcher bars have worked great. But they don’t come in a lot of the bigger sizes. So I needed to be able to make my own. That required a miter saw, which I already owned. But the only place to put it was in the garage…so suddenly it was time to clean up the garage. Several trips to the dump later, I was ready to cut stretcher bars. I later found a foot-powered underpinning machine online at a reasonable price and after some practice I can now assemble four bars into a actual frame.
Meantime, my wife was wondering out loud exactly where I planned to put the new printer. The answer was obvious: move my study into the spare bedroom and turn the study into a room for the printer. You got it: another huge project, resulting in a half-dozen more trips to the dump. Of course, once the old study was emptied out it became clear that it needed a new floor to replace the 20-year-old carpet…and we might as well paint the walls first, too!
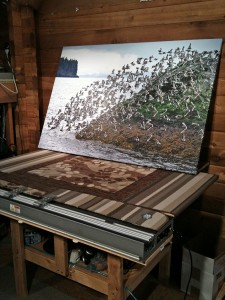
In early January Epson put the 9900 on sale and I ordered it, along with the software to run it. Soon I was printing my first big image. Called “Liftoff!,” it features a group of surf birds taking off from a rock near Cordova. It’s tack sharp with lots of detail and even at just under 40×60 inches it came out great!
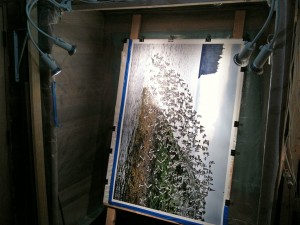
The next challenge was learning how to spray a top-coat onto the canvas. I had recently switched to a matte canvas which generated beautiful images but which needed protection from the elements — and from sticky fingers. I needed a sprayer, so it was time to abuse the old credit card one more time. I also needed a place to spray. A corner of my workshop was the obvious choice but it had to be cleaned out first and — you guessed it — I had to make a couple more trips to the dump! A sheet of plastic, a few 2x4s and some lights were all that I needed to have a working spray booth. I’ve got an exhaust fan on order but this works fine for now with the door open, and I wear a respirator. Of course it took some practice to get everything working right before I tackled the big picture.
The final step in the process was stretching the image. I use a compressed-air powered machine that (of course) had to be upgraded. When I first got the new machine it was slipping and the canvas wasn’t being stretched tightly enough. A couple of calls to the manufacturer and some adjusting soon resulted in beautiful, drum-tight stretches. Finally, I was ready to try stretching Liftoff! It worked perfectly and my first giant canvas was now a reality.
By the time I got everything working right, I was less than a week away from a reception featuring large canvases. Georgia and I didn’t get much sleep that week, but it was all worth it. The reception went off splendidly. And you know what? Bigger does make a difference. The emotional impact — the “Wow!” factor — is real. And the subtle details that help the photograph tell a story were there for all to see.


